Showing posts with label :Move. Show all posts

Monday 7 August 2017

kitronik :Move mini buggy (Python control of LEDs)

In two previous posts I looked at control the :Move buggy using JavaScript Blocks or Python. In this post we are going to look at controlling the LEDs using Python (or more accurately micropython).

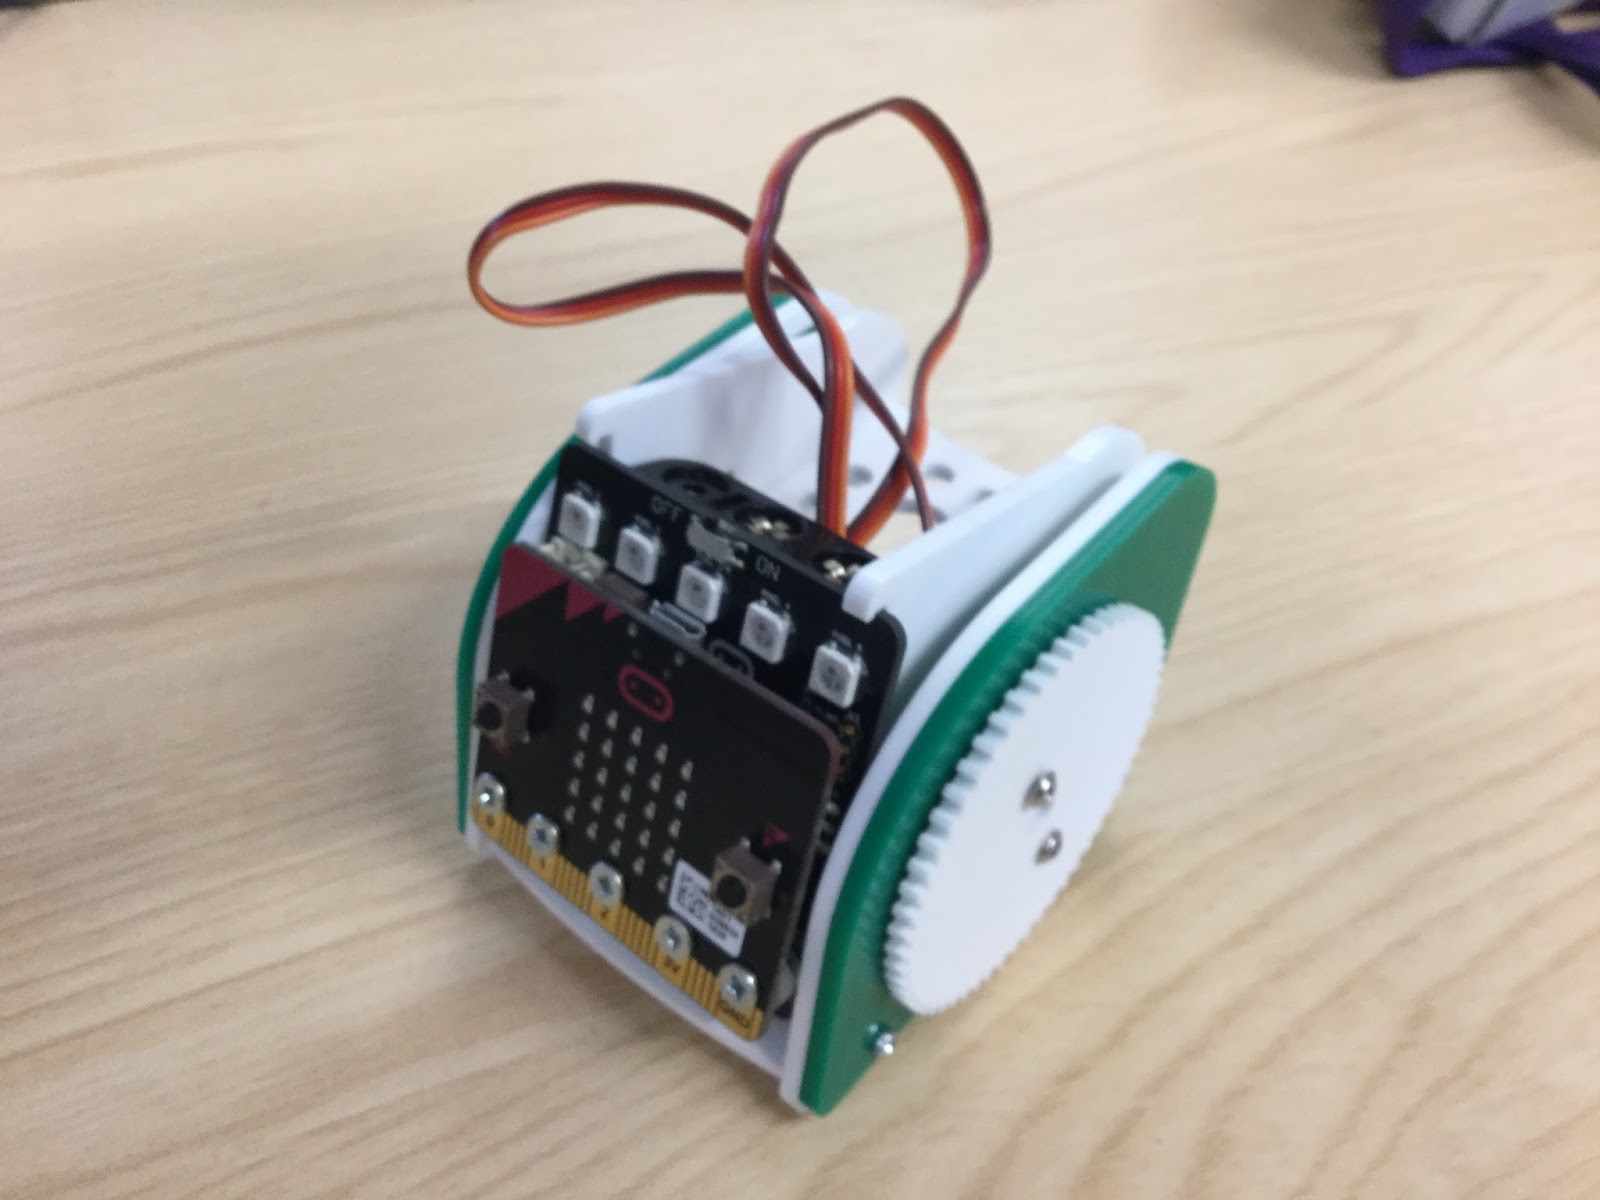
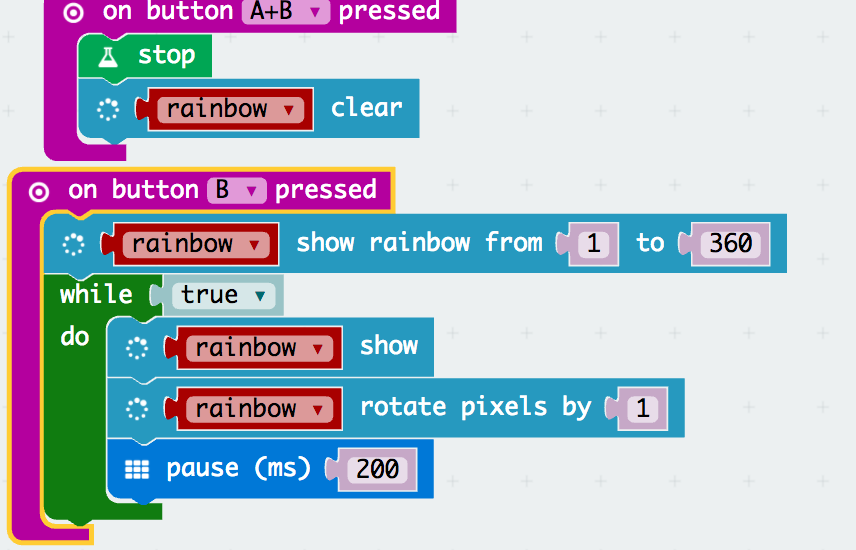
Pin 0 controls the LEDs, they are based on5  NeoPixel compatible, RGB, addressable LEDs; so the Neopixel protocols (and library for Neopixels) can be used. 


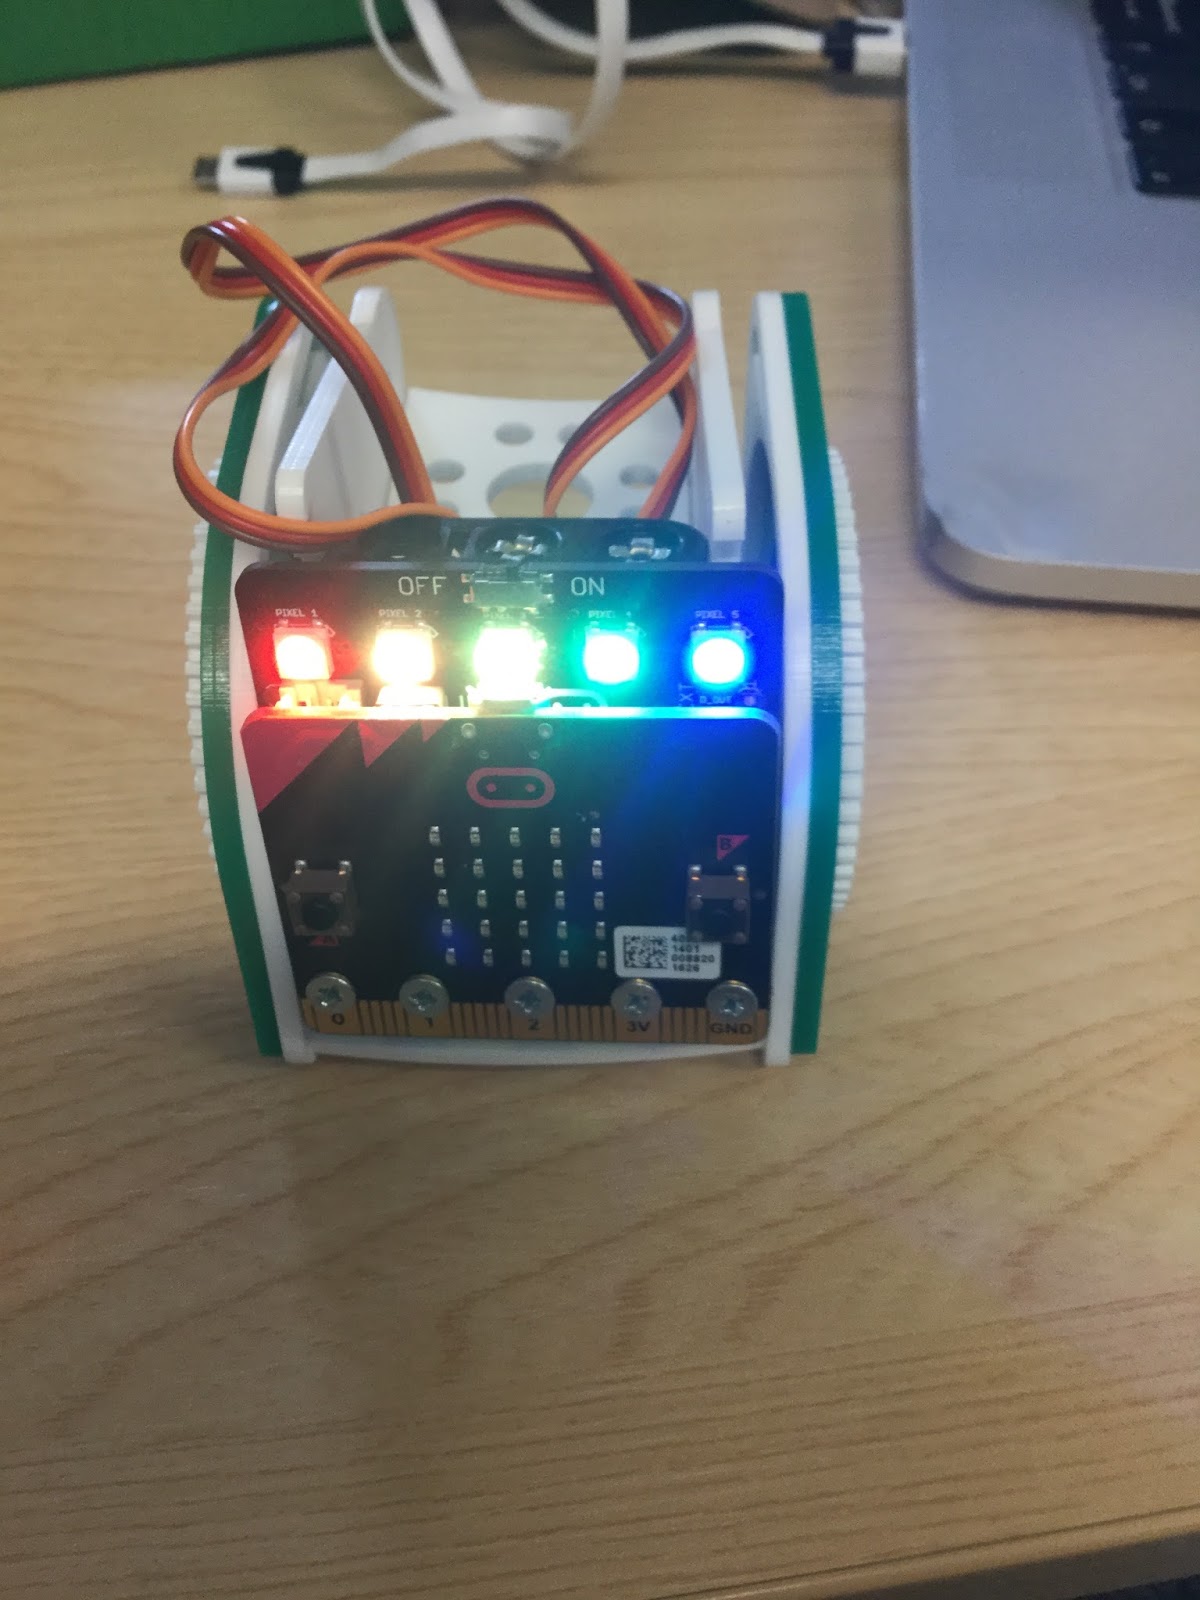
Code First five colours of the rainbow. The array lig holds the RGB settings for the rainbow colours (more details on the RGB colours can be found at Lorraine Underwood's Halloween Cloud project). In the code below, the five LEDs have a different colour allocated to them.

from microbit import *
import neopixel

np = neopixel.NeoPixel(pin0, 5)
lig=[[255,0,0],[255,127,0],[255,255,0],[0,255,0],[0,0,255],[75,0,136],[139,0,255]]
while True:
    np[0] = lig[0]
    np[1] = lig[1]
    np[2] = lig[2]
    np[3] = lig[3]
    np[4] = lig[4]

    np.show()


Code to cycle through the rainbow
from microbit import *
import neopixel

np = neopixel.NeoPixel(pin0, 5)
lig=[[255,0,0],[255,127,0],[255,255,0],[0,255,0],[0,0,255],[75,0,136],[139,0,255]]
count1=1
count0=0
count2=2
count3=3
count4=4
while True:
        np[0] = lig[count0]
        if count0>=6:
            count0=0;
        else:
            count0=count0+1
        np[1] = lig[count1]
        if count1>=6:
            count1=0;
        else:
            count1=count1+1
        np[2] = lig[count2]
        if count2>=6:
            count2=0;
        else:
            count2=count2+1
        np[3] = lig[count3]
        if count3>=6:
            count3=0;
        else:
            count3=count3+1
        np[4] = lig[count4]
        if count4>=6:
            count4=0;
        else:
            count4=count4+1
        np.show()

        sleep(500)


All opinions in this blog are the Author's and should not in any way be seen as reflecting the views of any organisation the Author has any association with. Twitter @scottturneruon

kitronik :Move buggy (Python controlled servos)

In a previous post I looked at controlling the Kitronik :Move buggy using Javascript based blocks. In this short post I will show controlling the servos of the micro:bit based :Move buggy with Python.

Control is via pin1(left motor) and pin2 (right motor) and the motors have to be driven in opposite directions to move forward or backwards. The direction of the motors is controlled by the analogue value written to the pins; pinX.write_analog(180) - anticlockwise or pinX.write_analog(1) - clockwise (pinX.write_analog(0) - stops the motor). Setting the analog_period seems to work at 20ms; this was found by experiment, discussed in a previous post.

So the initial code below sets up the moves for forward, backward, turn left, turn right all controlled with a move for so many milliseconds.

Code 
from microbit import *

pin1.set_analog_period(20)
pin2.set_analog_period(20)

def forward(N):
    pin1.write_analog(180)
    pin2.write_analog(1)
    sleep(N)
    
def backward(N):
    pin1.write_analog(1)
    pin2.write_analog(180)
    sleep(N)

def turnLeft(N):
    pin1.write_analog(1)
    pin2.write_analog(1)
    sleep(N)

def turnRight(N):
    pin1.write_analog(180)
    pin2.write_analog(180)
    sleep(N)

while True:
    forward(1500)
    backward(1500)
    turnLeft(1500)
    turnRight(1500)   

I would recommend running the :Move buggy on a surface that isn't smooth, I found the wheels slipping on a smooth surface. This is a really nice little robot to play with.

All opinions in this blog are the Author's and should not in any way be seen as reflecting the views of any organisation the Author has any association with. Twitter @scottturneruon

Wednesday 26 July 2017

kitronik :Move mini buggy (JavaScript blocks)

Finally got around to building add playing with the Kitronik :Move https://www.kitronik.co.uk/5624-move-mini-buggy-kit-excl-microbit.html (see below - I decided to put the green sides on the outside - just to be different). One of its features is a vertical set of holes for a pen to be placed in.


Add the blocks (found at https://github.com/KitronikLtd/pxt-kitronik-servo-lite) in blocks editor (https://makecode.microbit.org/) to control the motors. You can do the same thing with writing to the pins, those instructions come with the build instructions, but using the extra blocks  is a little easier to understand. Also add the package for neopixels (type in neopixels in the search box to find them). Two very good tutorials I found useful to start with can be found at:


1. Motor example
I wanted it so that press A on the Micro:bit the robot goes turns right, goes forward, goes back and turns left. 


A stop block does need to be included, without it the :Move will continue moving. The wheels I found can slip on some surfaces reducing the precision, but still fun to play with.

2. At the start and stopping.
I want to use the motors and the 'pixels', but I want to have a known starting position for the motors and set the turning speed; this was possible using the blocks (see below). The pixels are set at this point on pin P0 (see below) as well. 

To stop both the motors and cycling of the pixels - pressing buttons A+B together was set up to this.


3. Rainbow on the pixels.
On pressing button B the pixels rotate through a range of colours.


4. Summary
This is great fun. Having the set of blocks adding for the servos means it is a bit simpler to work with. 


All opinions in this blog are the Author's and should not in any way be seen as reflecting the views of any organisation the Author has any association with. Twitter @scottturneruon

Top posts on this blog in March 2024

The Top 10 viewed post on this blog in March 2024. Covering areas such as small robots, augmented reality, Scratch programming, robots. Micr...