Showing posts with label board. Show all posts
Showing posts with label board. Show all posts
Saturday 22 October 2016
Disco micro:pixel
In a previous post Proto-Pic board, Microbit and Micropython I played with the Proto-Pic micro:pixel 4x8 NeoPixel board.
This post is just a short description of a quick play with making it flashing blocks of different colours across the board. The routine produces five random numbers (three to define the colours, one for which pixel is selected and the last for the delay each iteration). The idea of being - a pixel is selected, but so are the ones either side of it, each one has a different combination of the colour values, but only two of the pixels are turned off after the delay.
from microbit import *
import neopixel, random
# Setup the Neopixel strip on pin0 with a length of 2 pixels
np = neopixel.NeoPixel(pin0, 32)
while True:
pxl=random.randint(1,30)
rd=random.randint(1,32)
gr=random.randint(1,32)
bl=random.randint(1,32)
t1=random.randint(10,100)
np[pxl] = (rd, gr, bl)
np[pxl-1] = (gr, bl, rd)
np[pxl+1] = (bl, rd, gr)
np.show()
sleep(t1)
np[pxl] = (0, 0, 0)
np[pxl+1] = (0, 0, 0)
The video below shows the routine in action. There is no connection between the pixels and the music on the video - but making the connection between music and the pixels would be an interesting project.
All opinions in this blog are the Author's and should not in any way be seen as reflecting the views of any organisation the Author has any association with. Twitter @scottturneruon
Thursday 20 October 2016
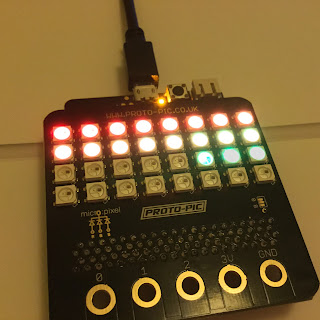
micro:pixel board, micro:bit and micropython
A new (or to me at least) addition to devices you can attach a Micro:Bit to, is the Proto-Pic micro:pixel 4x8 NeoPixel board; essentially a board with 4 x8 grid of NeoPixels that you plug the Micro:Bit into. Following the advice of the website the values of RGB are all set to 32 or below to avoid pulling too much power. Pin0 is used to write to. You will need to use the Mu editor for this.
Two tests were tried
Example 1: To get the pixels to appear to light up from the last to the first one.
from microbit import *
import neopixel
np = neopixel.NeoPixel(pin0, 32)
while True:
for x in range(0, 32):
for y in range(0, (32-x)):
np[y] = (y, 32-y, 1)
if (y>0):
np[y-1]=(0,0,0)
np.show()
sleep(30)
Example 2: To randomly select a pixel and its colour.
from microbit import *
import neopixel, random
np = neopixel.NeoPixel(pin0, 32)
while True:
pxl=random.randint(0,31)
rd=random.randint(1,32)
gr=random.randint(1,32)
bl=random.randint(1,32)
np[pxl] = (rd, gr, bl)
np.show()
sleep(500)
np[pxl] = (0, 0, 0)
This is a good, fun board to play with; relatively easy to use.
All opinions in this blog are the Author's and should not in any way be seen as reflecting the views of any organisation the Author has any association with. Twitter @scottturneruon
Subscribe to:
Posts (Atom)
Top posts on this blog in March 2024
The Top 10 viewed post on this blog in March 2024. Covering areas such as small robots, augmented reality, Scratch programming, robots. Micr...
