Monday 1 May 2017

Microbit Remote Control CBiS Car

I wanted to contol the CBiS micro:Bit Car via gestures whilst holding another micro:Bit (see Figure 1)

I went for:
- Button A in combination with moving the micro:bit left or right, moves 'Car' forwards or backwards;
- Button B in combination with moving the micro:bit rotated forward or backwards, turns the 'Car' left or right;

Perhaps not the most logical combination but fun.
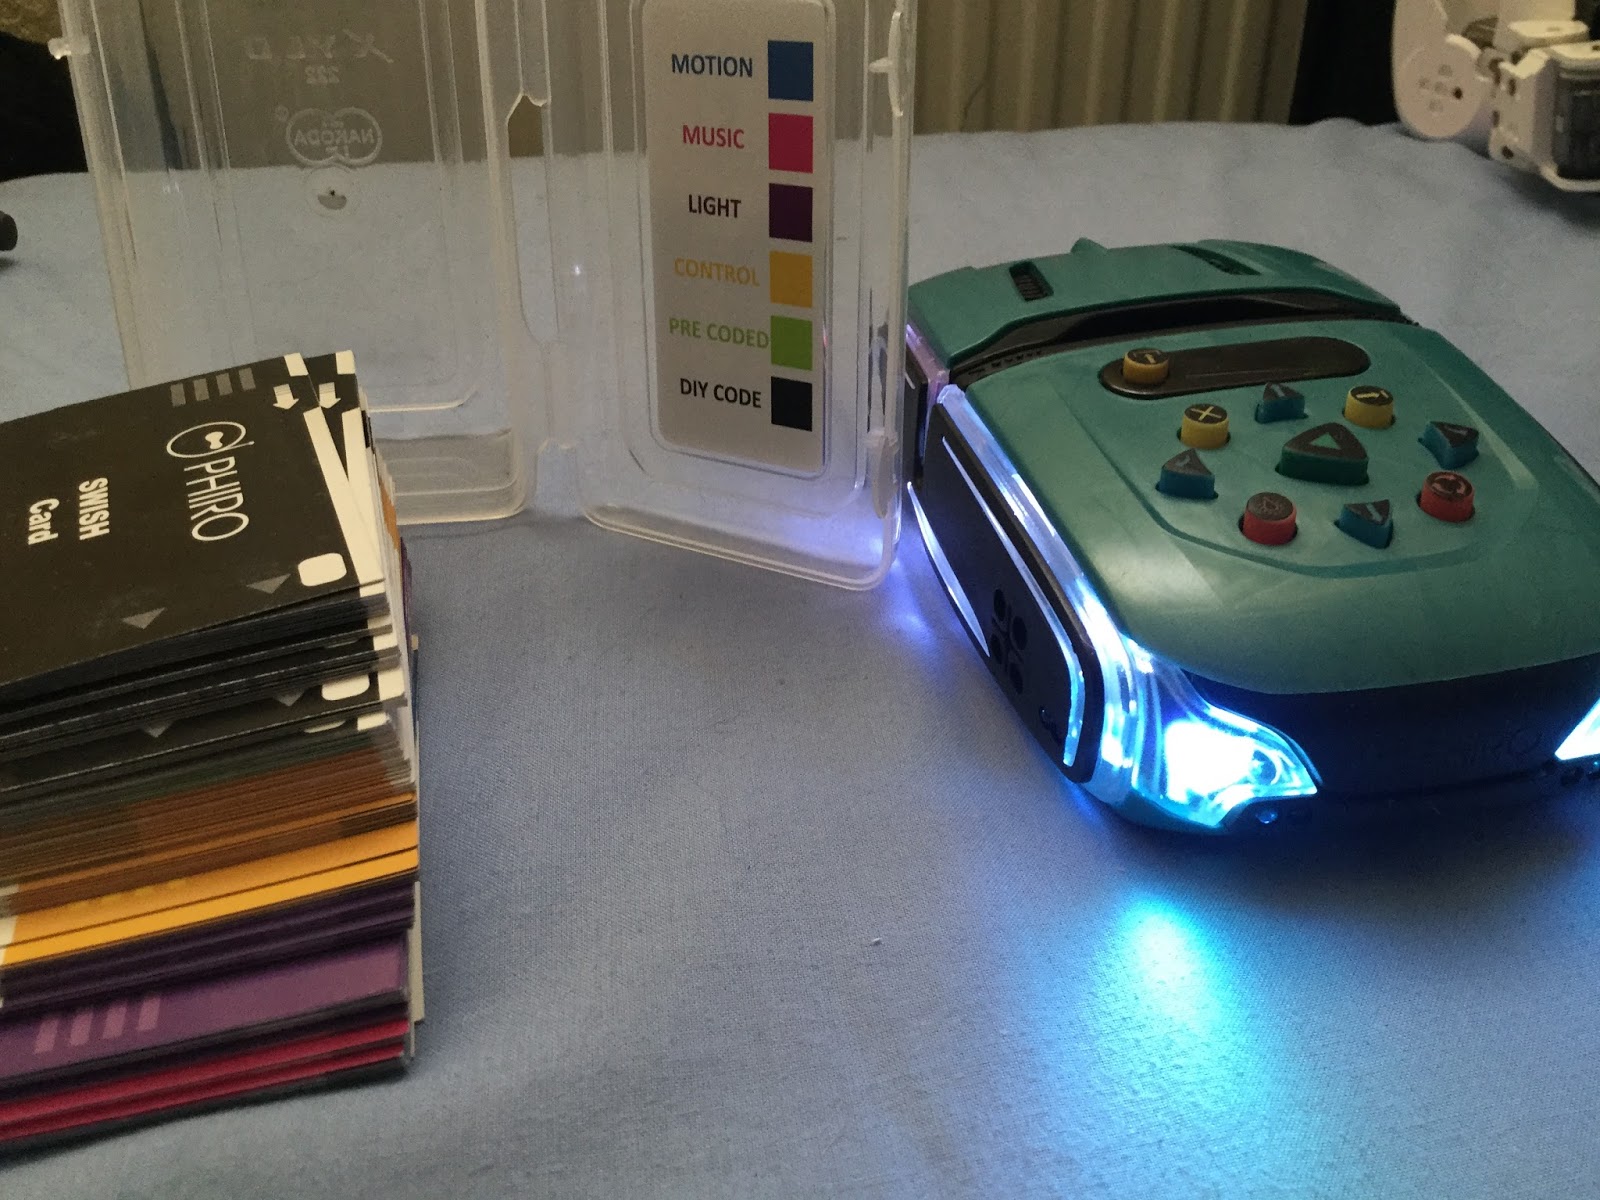
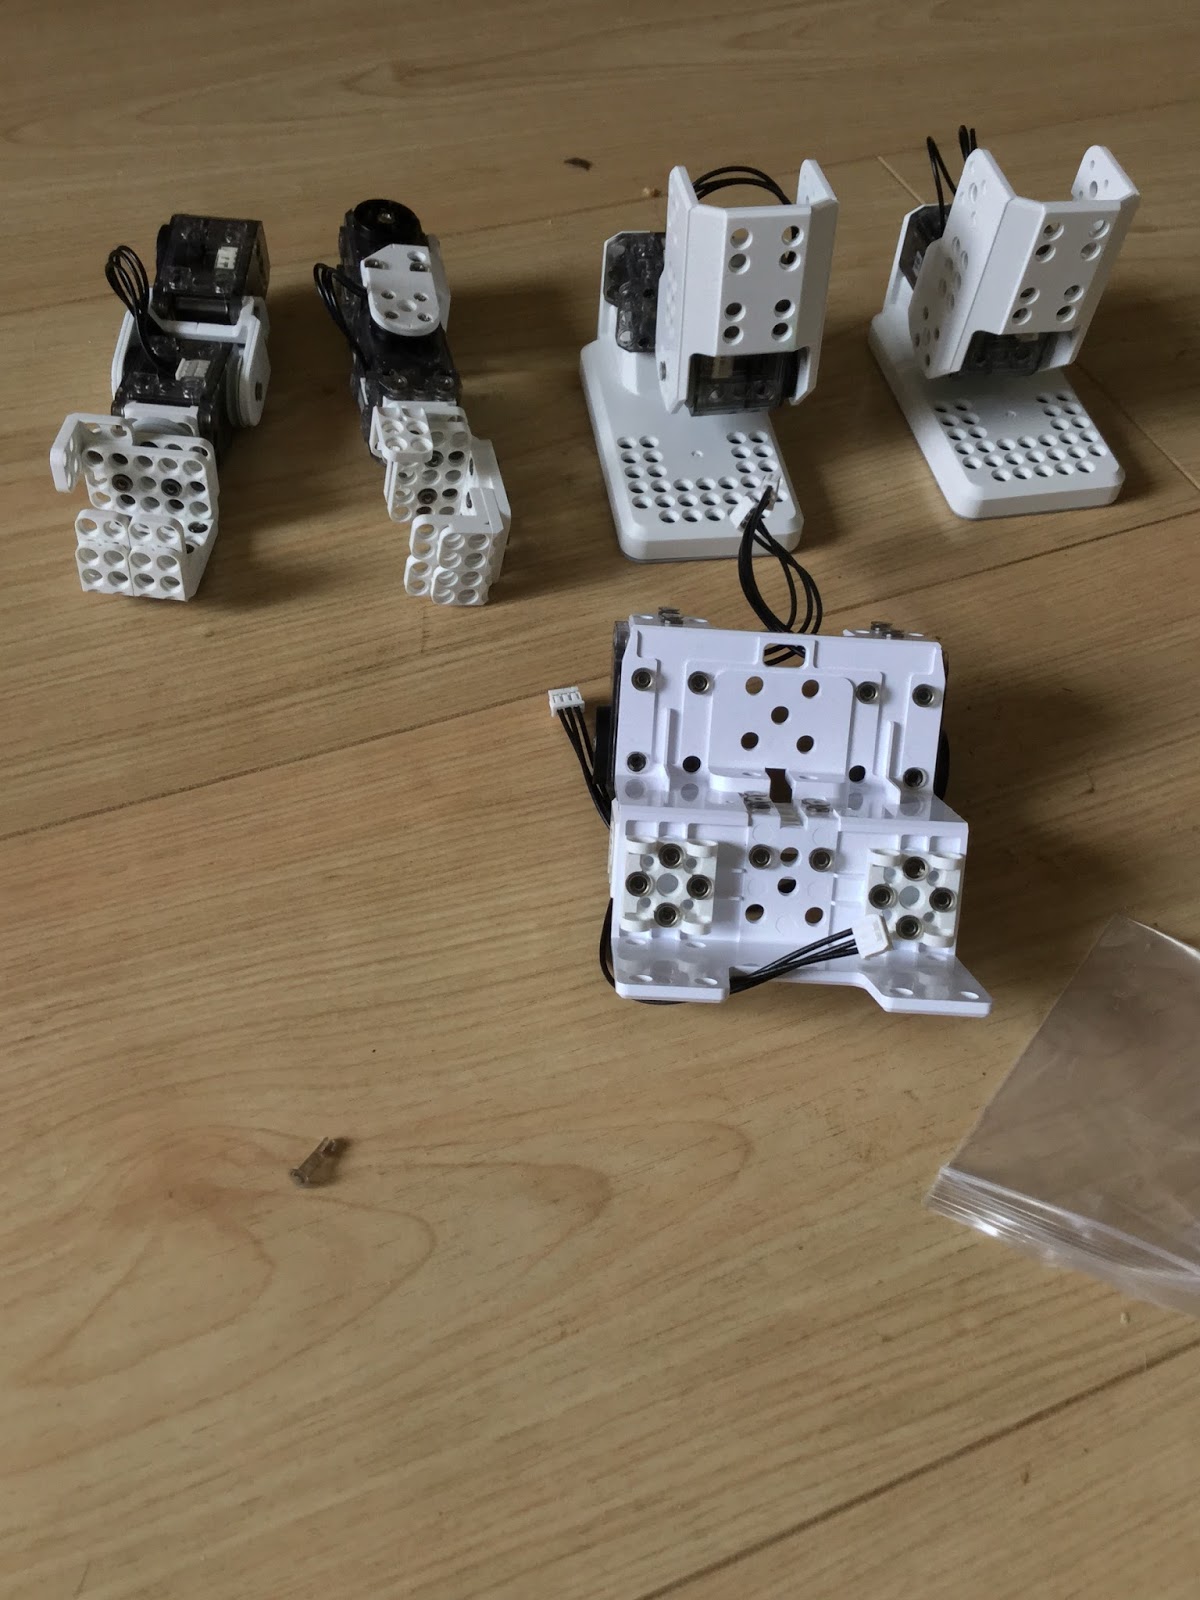
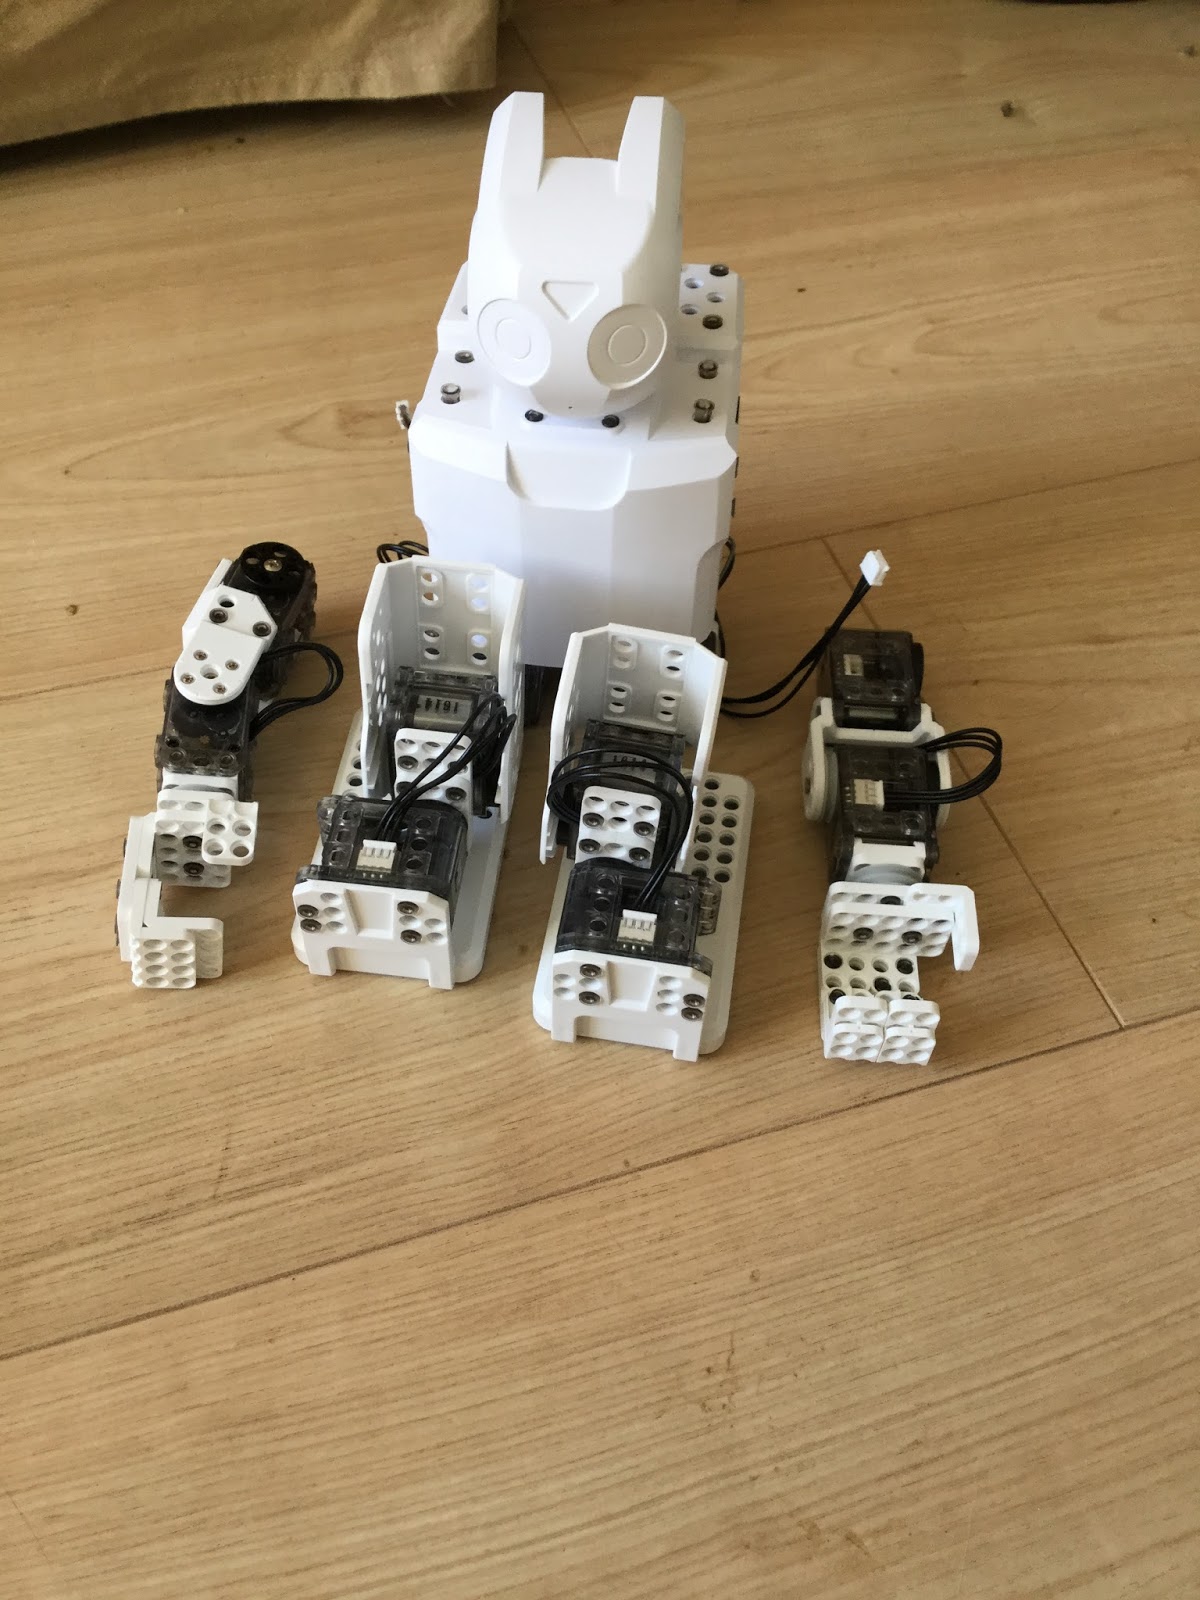
Figure 1: CBiS micro:bit car and 'controller' micro:bit

The inspiration from this remote car idea came from four sources
- CBiS Education site and seeing them demonstrating it;
- Technology with Save Us Micro:bot Radio Control website ;
- DrBadgr blog on the Lunch Box robot;
- A twitter conversation


The approach taken is simple; the Controller micro:bit has the following operations (see Figure 2 for the PXT code)

  • Buttons A+B together send '0' out by a radio protocol;
  • Button A with changes in the x-direction send '1' or '2';
  • Button B with changes in the y-direction send '3' or '4' ;


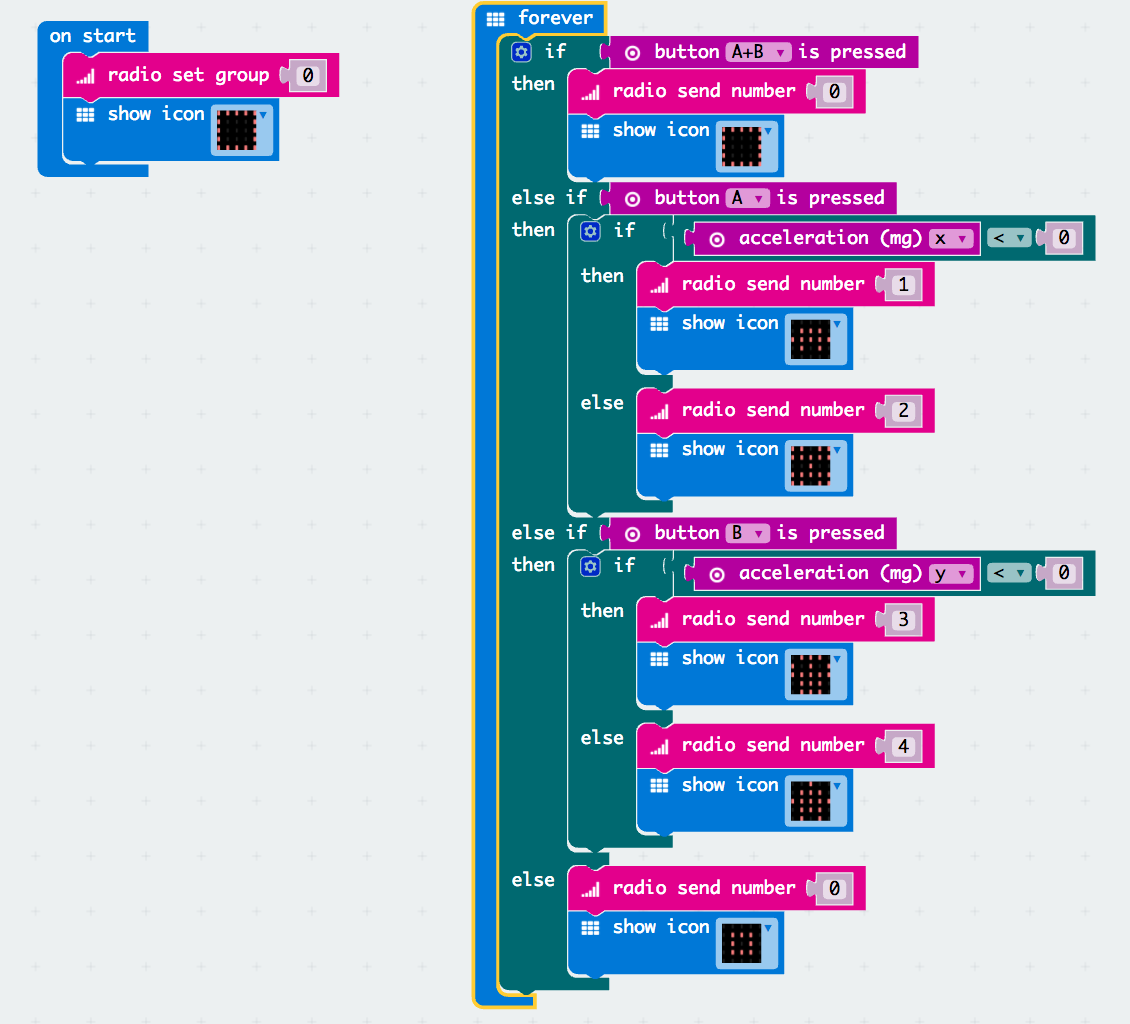
Figure 2: Remote Control 
For the code go to: Remote Control - the images produce on the micro:bit, are there as a bit of fun (they have no meaning) and are different for each action.


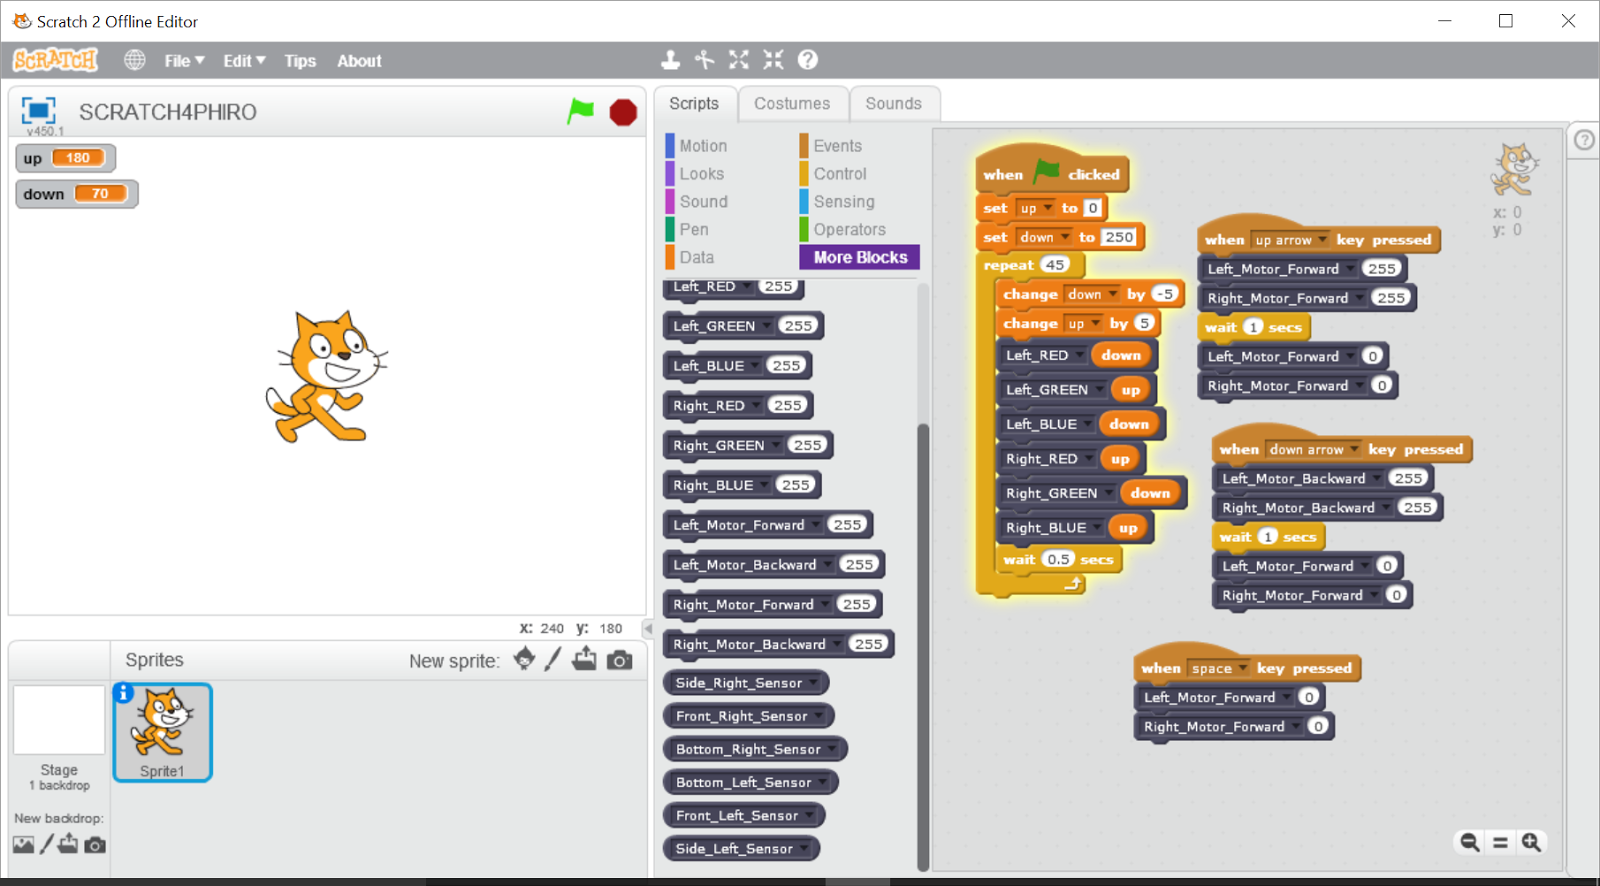
The control on the 'Car' turns the received numbers  (sent from the controller) into forward, backward, turning motions and stop. The PXT code can be found at Motor Control.


Figure 3: Car Control

The control is basic but fun (well I enjoyed it). There is a lot of scope for improvement and adaption. Please feel free to adapt any of the code and it would be great to hear what others do via the comments.


All opinions in this blog are the Author's and should not in any way be seen as reflecting the views of any organisation the Author has any association with. Twitter @scottturneruon

Wednesday 26 April 2017

Silly Cozmo videos (updated)

As a bit of fun some videos using Anki's Cozmo.


Did really mean for this one to be as dark as this.


Moody Cozmo - Normally happy, but just don't put it on it's side.


Related link: http://robotsandphysicalcomputing.blogspot.co.uk/2017/02/cozmo.html 

All opinions in this blog are the Author's and should not in any way be seen as reflecting the views of any organisation the Author has any association with. Twitter @scottturneruon

Sunday 23 April 2017

Bigtrak's little sibling - Rover


Recently bought a Bigtrak Rover, kind of the smaller 'sibling' of a Bigtrak (see above). 

Mobile Phone
It has the some of the same functionality as the Bigtrak, though no cannon sound. Control is via an iPhone or Android phone app, giving the same direction and number of steps functions (see below) found on the larger Bigtrak.


Control via another device.
What is different to the Bigtrak is it can be controlled remotely from a PC, Mac or Tablet via a web interface. It also uses the phone's camera to provide a video stream and remote control via on-screen controls. What it doesn't have is programmable control (or I haven't found it yet). The web interface is Flash based; so there may be problems running this on iPads.


Overall
A Nice, little robot that use the phone to control the robot.  A set of cones gives the option of setting up an obstacle course. Once the app is installed it is very easy to get going with this. Would have liked programming from a PC or Mac. At the price, this is a good fun piece of kit. 


Related Links


All opinions in this blog are the Author's and should not in any way be seen as reflecting the views of any organisation the Author has any association with. Twitter @scottturneruon

Sunday 9 April 2017

CBiS Education Micro:Bit based Robot Car

At PiWars 2017 (1st-2nd April 2017), thanks to the generosity of CBiS Education, I now have one of their BBC micro:bit RobotCar . It is a sturdy bit of kit, encased in an aluminum chassis with a clear acrylic screen - it feels substantial when you pick it up. 

It is based around fours motors, control by a Micro:Bit, via L298N based motor controller/shield. Batteries power, 8 AAs, the motors and a Lithium powerbank to power the Micro:Bit - all included. 

More information about the technical details and example software can be found on their site https://www.cbis.education/robotic-car-kit# including further details on the L298N based motor controller/shield, which I found useful for programming it. 


I have experimented briefly with programming it in Python (micropython), getting it to it move forward, backward; to the right and left, using the Mu editor. 

The code is shown below for those who want to try it:

from microbit import *


def forward(n):
    pin13.write_digital(1)
    pin16.write_digital(1)
    sleep(n)
    
def backward(n):
    pin14.write_digital(1)
    pin15.write_digital(1)
    sleep(n)

def stopit(n):
    pin13.write_digital(0)
    pin14.write_digital(0)
    pin15.write_digital(0)
    pin16.write_digital(0)
    sleep(n)

def spinLeft(n):
    pin13.write_digital(1)
    pin15.write_digital(1)
    sleep(n)

def spinRight(n):
    pin14.write_digital(1)
    pin16.write_digital(1)
    sleep(n)


while True:
    forward(500)
    stopit(1000)
    backward(500)
    stopit(1000)
    spinRight(1000)
    stopit(1000)
    spinLeft(1000)
    stopit(1000)


This thing is quick. I like the feel of it, you pick it up and it doesn't feel like it is going to fall apart; because it comes all assembled - including batteries, it is ready to go. I look forward to trying some more ideas on it.


All opinions in this blog are the Author's and should not in any way be seen as reflecting the views of any organisation the Author has any association with. Twitter @scottturneruon

Tuesday 4 April 2017

My photo experience at PiWars 2017

I was only able to stay at Pi Wars for a short while on Saturday 1st April. Even so, as a spectator, it was good fun. Here are a few pictures (and a video) for the day.


Skittles - The course designers don't make anything easy.


Golf Course


Obstacle Course 


It was not all robots, here is a Pi Controlled Drum Machine


My new toys


All opinions in this blog are the Author's and should not in any way be seen as reflecting the views of any organisation the Author has any association with. Twitter @scottturneruon

Sunday 2 April 2017

Micro:bit, PXT, Micro:pixel and Rainbows

Continuing to play with PXT (http://pxt.microbit.org) and the Micro:bit, I wanted to try this in combination with a Proto-Pic Micro-pixel board with its 32 neopixel LEDs.

The routine (shown in the screenshot below) use the Neopixels package (use the add package option on the menu to add it) to do two things:

  • On pressing button B - cycle through the colours and shift the colour to the next pixel producing a shifting pattern.
  • On pressing button  A - the pixels are cleared one by one.

Code is shown above, and thank you to Jonathan "Peli" de Halleux (@pelikhan) for pointing out the redundant code I had left in, it is appreciated.

The video below shows the system in action:


You can try the code out in the simulator below:


All opinions in this blog are the Author's and should not in any way be seen as reflecting the views of any organisation the Author has any association with. Twitter @scottturneruon

Tuesday 28 March 2017

Micro:bit Hot-Cross Buns with Microsofts's PXT (with video)


Just been playing with Microsoft's PXT language for the Micro:bit - so had a go at 'Hot Cross Buns'. Nice to see it shows in the simulator the wiring connections to the speakers.


Hot-Cross Buns - runs on either button A or B being  pressed. 
By the way if the sound is anoying you, press the stop button on the simulator below.


All opinions in this blog are the Author's and should not in any way be seen as reflecting the views of any organisation the Author has any association with. Twitter @scottturneruon

Sunday 26 March 2017

Phiro Pro Robot - a little box of fun.

Phiro Pro is a recently released education robot kit from Robotix Learning Solutions. Designed to be flexible, you can add LEGO to it or work without it; sensors on the sides, front and bottom; built-in speaker and RGB controllable 'headlights'.


One of the other interesting features is the robot can be controlled in three general ways/modes:

  • Using buttons on the robot to enter a sequence of moves - a bit like a Bigtrak
  • Using swipe-cards (see the figures below)
  • Programming using:
    • Scratch - Mac or PC
    • Snap4Phiro - Arduino programming PC/Mac/Linux basded.
    • Pocketcode on smartphone.


The first two are fun and are also available on their lower-priced Phiro Unplugged version, but the real (for me any way) is programming it. So far I have only played with the Scratch instructions (see below) - getting it to move to key presses and to get the 'headlights' to cycle through a range of colours.


The software is free to download and there are numbers of lessons and activities on the site - the only criticism of the site is the manuals for the software were not very easy to find,  included in the section for the lesson  (though I might have missed another way to get to them).

Setting it up is up is relatively easy, but the instructions need to followed carefully - I set-up the software in the wrong folder (not following the instructions properly) and it delayed geeting it working. It is good fun to play with in all the modes (my favourite is programming though). 

The stated research backing is good to see on the website, but then I am biased (see the last one).


More about this robot kit can be found at http://www.robotixedu.com/phiro.aspx or Twitter at 


All opinions in this blog are the Author's and should not in any way be seen as reflecting the views of any organisation the Author has any association with. Twitter @scottturneruon

Sunday 19 March 2017

Pi-Tops, Bloxels, unplugged computing and Scouts

Recently I supported an activity for a local Scout group's Beavers and Cubs, as help towards a badge. Four main activities were run.

Three Raspberry Pi based Pi-Top CEEDs (https://pi-top.com/product/ceed) were used to go through parts of a computer and to have a go at programming in Scratch.


Nice thing about the Pi-Top CEEDs are there are quick to set-up  and to store; and the parts are clear to see.

Another activity revolved around the use of Bloxels  (http://www.bloxelsbuilder.com/) to make games. This is a system that uses coloured blocks on a board to make levels and characters for , usually, a platform based game that is downloaded through an an App to a device. With the Bloxels they made a level in a game, by putting the appropriate blocks on the board and using an App to turn it into a playable level.


Two unplugged activities
- Making a list of instructions for open a drinks bottle and pouring out the contents. There are a few sneaky elements in this such as turn the top anti-clockwise but do you need to take your hand off (or at least loosen your hand on)  the top to complete it? Also they have  to try it out following the instructions.
- On paper make a list of instructions for a paper-based game, so it involved paper, pens and dice.


All opinions in this blog are the Author's and should not in any way be seen as reflecting the views of any organisation the Author has any association with. Twitter @scottturneruon

Thursday 16 March 2017

Turning junk into 'robots' at Wicksteed Park

I recently ran a talk and workshop on Junkbots at Wicksteed Park's Science Cafe as part of British Science Week. 


The slides below contain the talk.


The Science Café was established at Wicksteed Park, as the Park's creator Charles Wicksteed was an inventor and a successful engineer, giving visitors the opportunity to engage in science activities over coffee and cake in an informal and fun environment.

News articles about this workshop:


All opinions in this blog are the Author's and should not in any way be seen as reflecting the views of any organisation the Author has any association with. Twitter @scottturneruon

Sunday 12 March 2017

Build yourself a Crumble Junkbot


Over the last eight years I have been working (off and on) on a project, junkbots (http://junkbots.blogspot.co.uk/2010/01/introduction.html), in which 'junk' is used to embed environmental, engineering and computing concepts. One part that has grown from this project is using drinks cans, motor, batteries and something to unbalance the motor to produce a vibrating 'bot' that move along a smooth surface. 

To add a little more control both Raspberry Pis (http://robotsandphysicalcomputing.blogspot.co.uk/2015/07/raspberry-pi-controlled-robot-from-junk.html) and Micro:bits (http://robotsandphysicalcomputing.blogspot.co.uk/2016/09/do-it-yourself-remote-controlled.html) have been investigated.


In this post a Crumble controller from Redfern Electronics is used. The crumble controller is an excellent board for this project, it is relatively cheap, it is programmable with it's own graphical language, and it has motor drivers built in. In the figure to the left the parts (apart from adhesive tape) used can be seen.

1. Building the body.
Tape three pens (with their lids on) on to the drinks can - making a tripod arrangement. Add (tape it on usually) a motor with something on the axle to unbalanced the motor; I use broken toy propellors but mis-shapen blu-tak; clothes pegs could be used.

2. Wiring up
Using croc-clips ideally, but loops of wire if not, connect the battery to the controller and also the motors to the controller. Plug in the USB cable into the controller and the computer.

3. Running and Controlling
Make sure the Crumble software (http://redfernelectronics.co.uk/crumble/) is installed on the computer. 

An example is shown below that drives the motor forward and then backward repeatly. You might need to change the percentage values based on experiment, for the motor used. In the video below the junkbot is shown in action.


All opinions in this blog are the Author's and should not in any way be seen as reflecting the views of any organisation the Author has any association with. Twitter @scottturneruon

Monday 6 March 2017

Robotis Mini Robot - building


Confession time, love playing with robots, but I am not a big fan of building robots from kits; this one was too much to resist after seeing what https://robotsinschools.com/, with their EdBot, have been doing. 

The EdBot is based around the Robotis Mini robot (I got mine from http://www.robotshop.com/en/robotis-darwin-mini-humanoid-robot.htmlis a robot kit with an open source embedded board,  uses the OpenCM9.04-C microcontroller, running on a 32bit ARM Cortex-M3. 


Software is free to download, I am running it on an Android (appropriately) Tablet.


At the moment I am at the calibration/setting up stage and finding I might have made a couple of mistakes in the build. Good fun so far but more to follow in future posts.


All opinions in this blog are the Author's and should not in any way be seen as reflecting the views of any organisation the Author has any association with. Twitter @scottturneruon

Saturday 4 March 2017

Robots at the Science Museum 2 (+few other things there)

No text (other than this sentence) but just a collection of photos from a recent visit to the Science Museum, London.


All opinions in this blog are the Author's and should not in any way be seen as reflecting the views of any organisation the Author has any association with. Twitter @scottturneruon

Top posts on this blog in March 2024

The Top 10 viewed post on this blog in March 2024. Covering areas such as small robots, augmented reality, Scratch programming, robots. Micr...